
Building a custom home is the culmination of years of dreaming, saving, and meticulously planning every detail of your future living space. Turning a set of paper blueprints or digital renders into a structural masterpiece hinges entirely on a single, critical decision: selecting the right partner to execute the build.
This process represents a massive financial and emotional investment. Selecting the wrong lead partner can quickly transform an exciting venture into a nightmare of catastrophic budget overruns, severe timeline delays, and compromised structural integrity. Too many property owners fall into the trap of treating builder selection like a simple bidding war, handing over their life savings to whichever party promises the lowest price per square foot.
Choosing who will construct your residence should be approached as hiring the CEO of a multi-hundred-thousand-dollar capital venture. You need a leader who possesses exceptional mechanical knowledge, rock-solid financial backing, uncompromising quality standards, and crystal-clear communication protocols. This comprehensive guide walks you through the step-by-step evaluation process needed to vet candidates, audit trade networks, analyze contract structures, and choose the ideal partner to bring your vision to life.
Match Your Architectural Vision with Specialized Experience

A common misconception in residential construction is that a license automatically qualifies someone to build any type of structure. Building a traditional farmhouse utilizing off-the-shelf lumber and standard roof pitches requires a vastly different skillset than assembling an ultra-modern minimalist structure featuring cantilevered concrete decks, floor-to-ceiling glass walls, and hidden steel framework.
When evaluating portfolios, look beyond polished marketing photos and slick social media feeds:
-
Assess Structural Continuity: Examine how past projects integrate with their surrounding landscapes, paying close attention to grading, drainage slopes, and foundation transitions.
-
Inspect Material Integrations: Look closely at joinery work, material transitions between stone and wood, and the precision of exposed structural elements.
-
Evaluate Style Specificity: Ensure at least thirty percent of the builder’s completed portfolio reflects the specific architectural language and complexity level of your proposed blueprints.
Rather than partnering with a high-volume developer whose business model relies on repetitive floor plans, hire specialized custom home builders who demonstrate proven expertise in your chosen architectural style and lot topography. Interview clients who have lived in their residences for three to five years to assess how well the structure, finishes, and moisture barriers have held up over time.
Financial Vetting Audit Protocol
-
Initial Screening: Verify active state licensing and check for open complaints with local licensing boards.
-
Insurance Verification: Confirm general liability limits and ensure active workers’ compensation coverage directly with the insurance provider.
-
Financial Capacity Check: Work with your lending institution to execute supplier credit checks and review bank references.
-
Final Decision: Partner only with firms showing spotless payment histories and strong credit lines with material suppliers.
Request active proof of state licensing, general liability insurance, and comprehensive workers’ compensation coverage. Never accept a simple paper certificate without calling the issuing agency directly to confirm policy limits and active status. Additionally, verify that the builder carries a sufficient builder’s risk policy to protect the structure against fire, storm damage, and theft during active construction.
To protect your investment, ask your construction lender to perform a thorough credit and background check. Choosing reputable general contractors who maintain spotless payment histories with local lumberyards and hold active credit lines with suppliers ensures your deposit won’t be siphoned off to cover debts from another client’s unfinished build.
Inspect the Quality of Thermal Envelopes and Exterior Protection
The exterior shell—or thermal envelope—of your home serves as the primary barrier against rain, snow, wind, and thermal transfer. Poor installation of exterior weather barriers or improper flashing details will inevitably allow moisture intrusion, leading to hidden rot, dangerous interior mold growth, and structural framing failure.
During initial interviews, ask detailed questions about how candidate firms manage their exterior trade crews:
-
Roofing Flashing Standards: Inquire about specific flashing protocols at roof-to-wall intersections, chimneys, and dormers, ensuring self-adhered ice-and-water membranes are applied along all eaves and valleys.
-
Cladding Rainscreen Systems: Confirm whether exterior cladding will be installed over an active rainscreen gap, allowing moisture that penetrates the siding to drain harmlessly away from the structure.
-
Window and Door Pan Flashing: Verify that all rough openings feature sloped sill pan flashing and compatible flashing tapes to prevent water from pooling beneath window frames.
During active site tours, insist that your primary partner works exclusively with proven local roofing contractors who back their flashing and shingle work with written labor guarantees. Similarly, inspect ongoing job sites to verify that skilled teams execute your exterior siding install, paying close attention to clean corner joints, proper expansion gaps, and seamless weather-resistive barrier overlaps.
Prioritize High-Performance Mechanical Infrastructure and Wiring
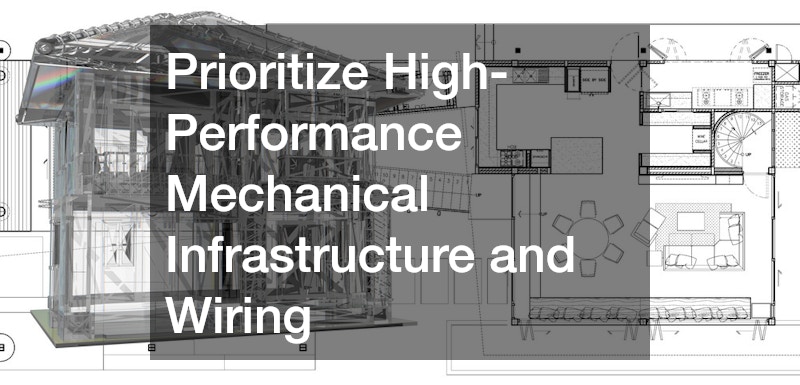
While custom countertops and hardwood floors get the most attention, a home’s mechanical infrastructure determines its daily comfort, indoor air quality, and operational energy efficiency. Undersized ductwork, poorly wired electrical panels, or hastily installed plumbing runs create chronic issues that are exceptionally costly to fix once drywall is installed.
Evaluating a candidate’s approach to interior mechanical infrastructure requires looking at three key areas:
-
HVAC Sizing and Duct Design: Ensure the team calculates heat loss and gain scientifically rather than relying on outdated rule-of-thumb square footage estimates.
-
Electrical Capacity and Smart Automation: Verify that the main service panel has sufficient amperage to handle modern electric vehicle chargers, heat pump technology, backup generator transfer switches, and low-voltage automation wiring.
-
Plumbing System Design: Check for home-run PEX manifold systems or properly insulated copper pipe runs that deliver hot water quickly while minimizing noise and pressure drops across fixtures.
Demand that your building partner engages certified HVAC contractors who perform precise Manual J load calculations and Manual D duct design layouts for every floor zone. Furthermore, confirm that all high-voltage distribution work, panel setups, and smart home integration are performed by licensed professionals who provide comprehensive electrical services.
Plan Heavy Site Prep, Earthwork, and Driveway Access
Every piece of land presents unique geological and hydrological challenges. Steep grades, high water tables, rocky soils, and expansive clay require specialized site engineering before foundation excavation even begins.
Key site prep considerations to review with your project leader include:
-
Geotechnical Soil Testing: Obtaining soil borings to confirm load-bearing capacity and identify expansive soils that require engineered soil replacement or deep pier foundations.
-
Stormwater Management: Designing swales, French drains, or retention ponds to divert surface runoff away from foundation walls and prevent soil erosion.
-
Construction Site Access: Establishing stable, heavy-duty gravel access roads that allow heavy concrete mixers, delivery trucks, and cranes to reach the building pad without getting mired in mud or damaging adjacent property.
Work alongside a licensed home contractor who insists on performing comprehensive soil testing prior to pouring footings, saving you from catastrophic foundation cracking down the road. Furthermore, ensure your team coordinates directly with experienced paving companies to properly grade, compact, and pave long-term access driveways capable of supporting heavy delivery traffic without rutting or settling.
Future-Proof Your Footprint for Modular Additions
A well-designed custom home should adapt to your family’s evolving needs over time. Whether you anticipate adding a guest suite, expanding a garage, or building a detached workshop years after initial completion, incorporating these possibilities into your initial blueprints saves massive amounts of time and money later.
Coordinate with your design team to pre-engineer logical expansion points into your original build strategy:
-
Plumbing and Electrical Rough-Ins: Cap off water, sewer, and electrical sub-panel feeds near prospective addition zones during primary construction so walls don’t need to be opened later.
-
Foundation and Framing Tie-Ins: Design foundation footings and rooflines so future structural additions can tie cleanly into the existing frame without disrupting primary load-bearing walls.
-
Site Plan Zoning Clearances: Verify local setback requirements and septic capacity limits early to ensure future additions won’t violate municipal codes.
Direct your architect and builder to design structural load points now if you intend to complete a seamless home addition like an in-law suite or bonus room down the line. To keep these complex details organized, partner with an established home building company that utilizes centralized project management software to track daily progress logs, structural change orders, and site photos in real time.
Establish Strict Change Order Rules and Weekly Check-Ins
Change orders—written documentation of modifications made to the original construction contract—are a primary driver of budget inflation and timeline delays. Whether caused by an owner changing their mind on a fixture location or an unforeseen site condition beneath the soil, change orders must be handled with strict discipline.
Establish clear protocols for handling change orders before breaking ground:
-
Mandatory Written Authorization: Require every change order to be drafted in writing, detailing the exact change in scope, material costs, labor fees, and impact on the overall completion schedule.
-
Pre-Approval Requirement: No physical work associated with a requested change should begin until both parties have reviewed and signed the formal change order document.
-
Weekly Standing Meetings: Establish a mandatory weekly meeting—either on-site or via videoconference—to review progress, audit active budget expenditures, and address upcoming decisions before they become critical bottlenecks.
Never approve a change order verbally on the job site; insisting on formal documentation keeps both parties accountable and prevents financial surprises at closing.
Spot On-Site Red Flags Before Signing Contracts
Before signing a contract, ask candidate builders to take you on a tour of two active, mid-stage job sites. An unannounced site visit provides an unfiltered look into how a company manages safety, quality control, and subcontractor discipline.
Pay close attention to these common job site warning signs:
-
Messy or Chaotic Work Areas: Construction debris left piling up around framing, uncollected trash, and food waste scattered across interior rooms reflect a lack of daily site discipline.
-
Unprotected Building Materials: High-grade lumber, engineered joists, and interior cabinetry left uncovered in rain or standing mud will warp, delaminate, and harbor mold growth.
-
Poor Safety Compliance: Subcontractors working at heights without fall protection, missing guardrails along open stairwells, and a general lack of personal protective equipment point to irresponsible management.
-
Vague or Evasive Communication: A builder who becomes defensive when asked for references, refuses to provide detailed line-item budget breakdowns, or hesitates to share subcontractor contacts should be eliminated from consideration immediately.
A disorganized, unsafe job site is a direct reflection of how a builder will handle your money, materials, and structural integrity.
Final Acceptance and Occupancy Sequence
-
Substantial Completion: The builder announces major structural and mechanical work is fully finished.
-
Third-Party Inspection: An independent home inspector conducts a comprehensive top-to-bottom audit of the property.
-
Punch List Compilation: The owner and inspector document all cosmetic, structural, or mechanical deficiencies.
-
Retainage Escrow Holdback: The owner retains a 5% to 10% financial holdback until all listed items are corrected.
-
Final Release and Warranty Transfer: Upon full punch list completion, final funds are released and formal warranty documentation is transferred.
Conduct a structured punch-list inspection systematically:
-
Perform an Independent Inspection: Hire a qualified third-party home inspector to review the completed structure, test mechanical systems, verify roof clearances, and check electrical outlets before your final walkthrough.
-
Check Cabinetry and Millwork: Open and close every cabinet door and drawer, inspect trim reveals for tight miter joints, and check doors for smooth latching without rubbing.
-
Verify Plumbing Fixtures: Run every faucet and shower simultaneously to verify water pressure, check drain speeds, and inspect under-sink plumbing for subtle leaks.
-
Test Mechanical Systems: Run both the heating and cooling cycles completely, verifying that air flows evenly from all supply registers and that digital thermostats function correctly.
Incorporate a standard retainage clause into your primary contract, allowing you to withhold five to ten percent of the final contract price until every single item on the punch list is resolved to your satisfaction.
Finally, secure a comprehensive, written express warranty. Standard industry guarantees usually provide a one-year warranty on general workmanship and materials, a two-year warranty on mechanical systems (plumbing, electrical, and HVAC ductwork), and a ten-year transferable warranty covering major structural components.
Pre-Contract Checklist for Homeowners

-
Verify state licensing, general liability insurance, and active workers’ compensation coverage directly with issuing agencies.
-
Confirm your builder maintains clean credit lines with local material suppliers and trade subcontractors.
-
Require all contract allowances to be backed by written quotes from suppliers rather than guesswork.
-
Visit active job sites to inspect thermal envelope protection, siding installations, and overall site cleanliness.
-
Establish a mandatory written change-order protocol and a weekly standing project update meeting.
-
Secure an express warranty covering workmanship, mechanical systems, and structural framing.
Take time to review your blueprints, outline your project goals, and prepare a detailed set of questions before interviewing candidate teams. Conducting thorough due diligence up front ensures that when ground finally breaks, you can watch your paper blueprints transform into a beautiful, durable home with absolute confidence.